- Published on
A Speech-to-Image App Using Replicate Webhooks
- Authors

- Name
- Ken Ruf

Svix is the enterprise ready webhooks sending service. With Svix, you can build a secure, reliable, and scalable webhook platform in minutes. Looking to send webhooks? Give it a try!
Today, we're going to see how webhooks (backed by Svix!) allows Replicate to deliver world class developer experience. Replicate lets you run and fine-tune open-source AI models and deploy them at scale via an API.
Webhooks unlock a few powerful use cases for Replicate. One is to chain multiple models together (i.e. feed an output from one model as an input to another) so we put together a speech-to-text-to-image app that lets you speak an image into existence.
You can find the GitHub repository here: https://github.com/svix-ken/replicate-webhook
Setup
We're going to use Next.js as it lets us build our frontend and backend in one place. You'll also need to create a Replicate account and a file storage solution (we use Bytescale in this demo). Luckily, Replicate has a nice guide using Next.js which we followed for the initial setup.
It's also helpful to install the Svix CLI so you can tunnel webhooks to localhost when testing.
Getting the Audio
After the initial setup, the first thing we need to do is capture the audio from the browser. We used the MediaRecorder from the MediaStreams API to record audio from the mic and turn it into a blob. The transcription API we're using requires a URL for the audio file, so once we've captured the audio and created a blob, we upload it to ByteScale.
'use client'

import { useState } from 'react'
import * as Bytescale from '@bytescale/sdk'

const AudioRecorder = (props) => {
  const [isRecording, setIsRecording] = useState(false)
  const [audioUrl, setAudioUrl] = useState(null)
  const [mediaRecorder, setMediaRecorder] = useState(null)
  const [stream, setStream] = useState(null)

  const uploadManager = new Bytescale.UploadManager({
    apiKey: process.env.BYTESCALE_API_KEY,
  })

  const handleUpload = async (audioBlob) => {
    try {
      const result = await uploadManager.upload({
        data: audioBlob,
      })

      props.transcribe(result.fileUrl)
    } catch (error) {
      console.error('Error uploading file:', error)
    }
  }

  let localAudioChunks = []

  const handleStartRecording = async () => {
    try {
      const userStream = await navigator.mediaDevices.getUserMedia({ audio: true })

      const mimeType = MediaRecorder.isTypeSupported('audio/webm;codecs=opus')
        ? 'audio/webm;codecs=opus'
        : 'audio/ogg;codecs=opus'

      const recorder = new MediaRecorder(userStream, { mimeType })

      recorder.ondataavailable = (event) => {
        if (event.data.size > 0) {
          localAudioChunks.push(event.data)
        }
      }

      recorder.onstop = () => {
        if (localAudioChunks.length === 0) {
          return
        }

        // Create a Blob from the recorded chunks
        const blob = new Blob(localAudioChunks, { type: mimeType })

        if (blob.size > 0) {
          const url = URL.createObjectURL(blob)
          setAudioUrl(url)
          handleUpload(blob)
        } else {
          console.error('Blob is empty')
        }

        localAudioChunks = []
      }

      recorder.start()

      setStream(userStream)
      setMediaRecorder(recorder)
      setIsRecording(true)
    } catch (err) {
      console.error('Error starting recording:', err)
    }
  }

  const handleStopRecording = () => {
    if (mediaRecorder) {
      mediaRecorder.stop()
      setIsRecording(false)

      stream.getTracks().forEach((track) => {
        track.stop()
      })

      setStream(null)
    } else {
      console.error('No media recorder available to stop.')
    }
  }

  return (
    <div>
      <h1>Audio Recorder</h1>
      <button onClick={isRecording ? handleStopRecording : handleStartRecording}>
        {isRecording ? 'Stop Recording' : 'Start Recording'}
      </button>

      {audioUrl && (
        <div>
          <h2>Recorded Audio</h2>
          <audio src={audioUrl} controls />
        </div>
      )}
    </div>
  )
}

export default AudioRecorder
We've created a simple button with 2 functions to handle when we start and stop the recording. When you click the button to start recording, the handleStartRecording function asks for permission to access your microphone using navigator.mediaDevices.getUserMedia. When permission is granted, it starts capturing the audio stream and sets up a MediaRecorder to handle the actual recording process.
As the audio is being recorded, chunks of data are created and passed to the ondataavailable event, which collects them into a temporary localAudioChunks array. These chunks will later be combined to create the full audio file.
Once you stop recording (by clicking the button again), the onstop event of the MediaRecorder is triggered. At this point, all the collected audio chunks are combined into a single Blob, which represents the recorded audio file.
To ensure everything is cleaned up properly, the handleStopRecording function stops the MediaRecorder and also stops the audio stream by calling getTracks() on the stream and stopping each track. It resets the stream and updates the isRecording state to reflect that recording has ended.
Once the recording is complete, the handleUpload function takes care of uploading the recorded audio file using the Bytescale upload manager.
Speech-to-Text
Now that we have a URL for our audio file, we can make the initial API call to Replicate to get a transcription.
We set up an API endpoint very similar to the setup in the Node.js guide except instead of polling this endpoint to figure out when the transcript is ready, we'll create a webhook endpoint where Replicate can send us notifications.
import { NextResponse } from 'next/server'
import Replicate from 'replicate'

const replicate = new Replicate({
  auth: process.env.REPLICATE_API_TOKEN,
})

export async function POST(request) {
  const audio = await request.json()

  const output = await replicate.predictions.create({
    // The version property specifies which model we want to use.
    version: '3ab86df6c8f54c11309d4d1f930ac292bad43ace52d10c80d87eb258b3c9f79c',
    input: {
      task: 'transcribe',
      audio: audio.url,
      batch_size: 64,
    },
    // The URL where we want to receive the webhook notification
    webhook: `https://replicate-webhook.vercel.app/api/webhooks/transcription`,
    // The events filter tells Replicate that we only want webhooks for specific events.
    webhook_events_filter: ['completed'],
  })

  if (output?.error) {
    return NextResponse.json({ detail: output.error }, { status: 500 })
  }

  return NextResponse.json(output, { status: 201 })
}
This endpoint simply takes the audio URL passed in the payload and initiates a call to Replicate's API with it as the input.
Since we want to receive a notification via webhook, we set the webhook property to our webhook URL and filter specifically for when the transcription is completed. This makes sure we don't wastefully send many webhooks for other statuses that we won't even use.
The first thing we'll do with the webhook endpoint is verify the webhook signature to ensure that Replicate is the actual origin of the webhook message. If we don't verify the signature, it's possible that malicious actors will send fraudulent messages. You can read more about why you should verify webhook signatures here: https://docs.svix.com/receiving/verifying-payloads/why.
Since we'll end up with 2 webhook endpoints, lets create a separate function for verifying the signature:
export default function verifySignature(req) {
    const webhook_id = req.headers.get("webhook-id") ?? "";
    const webhook_timestamp = req.headers.get("webhook-timestamp") ?? "";
    const webhook_signature = req.headers.get("webhook-signature") ?? "";

    const body = await req.text();

    const signedContent = `${webhook_id}.${webhook_timestamp}.${body}`;
    const secret = process.env.WEBHOOK_SECRET;

    // Decode the secret
    const secretBytes = Buffer.from(secret.split('_')[1], "base64");
    const computedSignature = crypto
        .createHmac('sha256', secretBytes)
        .update(signedContent)
        .digest('base64');

    try {
        const expectedSignatures = webhook_signature.split(' ').map(sig => sig.split(',')[1]);
        const isValid = expectedSignatures.some(expectedSignature => expectedSignature === computedSignature);

        if (!isValid) {
            throw new Error("Invalid signature");
        }
    } catch (err) {
        console.error("Webhook signature verification failed:", err.message);
        return new Response("Bad Request", { status: 400 });
    }
}
If you'd like to understand the details behind the signature verification process you can check out this article: https://docs.svix.com/receiving/verifying-payloads/how-manual
Make sure to add the webhook secret provided by Replicate as an environment variable to the Next.js project.
Once we're able to verify the signature, we extract the transcribed text from the payload and use it as the input prompt for the text-to-image model as well as broadcast it back to the client using Server Sent Events (SSE).
import verifySignature from '../verifySignature'

export async function POST(req) {
  verifySignature(req)

  // Parse the webhook payload
  const parsedBody = JSON.parse(body)

  if (parsedBody.status === 'succeeded' && parsedBody.output?.text) {
    const transcription = parsedBody.output.text

    try {
      const response = await fetch('https://replicate-webhook.vercel.app/api/text-to-image', {
        method: 'POST',
        headers: { 'Content-Type': 'application/json' },
        body: JSON.stringify({
          prompt: transcription,
        }),
      })

      const data = await response.json()
      if (response.ok) {
        console.log('Replicate output:', data)
      } else {
        console.error('Error from API route:', data.error)
      }
    } catch (error) {
      console.error('Error calling API route:', error)
    }
  } else {
    console.error('Invalid webhook payload or status not succeeded')
    return new Response('Bad Request', { status: 400 })
  }

  return new Response('OK', { status: 200 })
}
Text-to-Image
We can essentially repeat what we did for the speech-to-text model, except we'll make the API call that sends the transcribed text to the text-to-image model from the speech-to-text webhook endpoint.
import { NextResponse } from 'next/server'
import Replicate from 'replicate'

const replicate = new Replicate({
  auth: process.env.REPLICATE_API_TOKEN,
})

export async function POST(request) {
  if (!process.env.REPLICATE_API_TOKEN) {
    throw new Error(
      'The REPLICATE_API_TOKEN environment variable is not set. See README.md for instructions on how to set it.'
    )
  }

  const { prompt } = await request.json()

  const options = {
    version: '8beff3369e81422112d93b89ca01426147de542cd4684c244b673b105188fe5f',
    input: { prompt: prompt },
    webhook: `https://replicate-webhook.vercel.app/api/webhooks/image-generation`,
    webhook_events_filter: ['completed'],
  }

  // A prediction is the result you get when you run a model, including the input, output, and other details
  const prediction = await replicate.predictions.create(options)

  if (prediction?.error) {
    return NextResponse.json({ detail: prediction.error }, { status: 500 })
  }

  return NextResponse.json(prediction, { status: 201 })
}
This endpoint takes the transcribed text sent from the transcription webhook and sends it to the text to image model.
export async function POST(req) {
  verifySignature(req)

  // Parse the webhook payload
  try {
    const parsedBody = JSON.parse(body)

    // Persist the image in a future iteration

    return new Response('OK', { status: 200 })
  } catch (err) {
    console.error('Failed to parse webhook payload:', err.message)
    return new Response('Internal Server Error', { status: 500 })
  }
}
Again, we verify the signature. In a future blog, we'll demonstrate a second use case for Replicate webhooks: persisting the model data. Stay tuned!
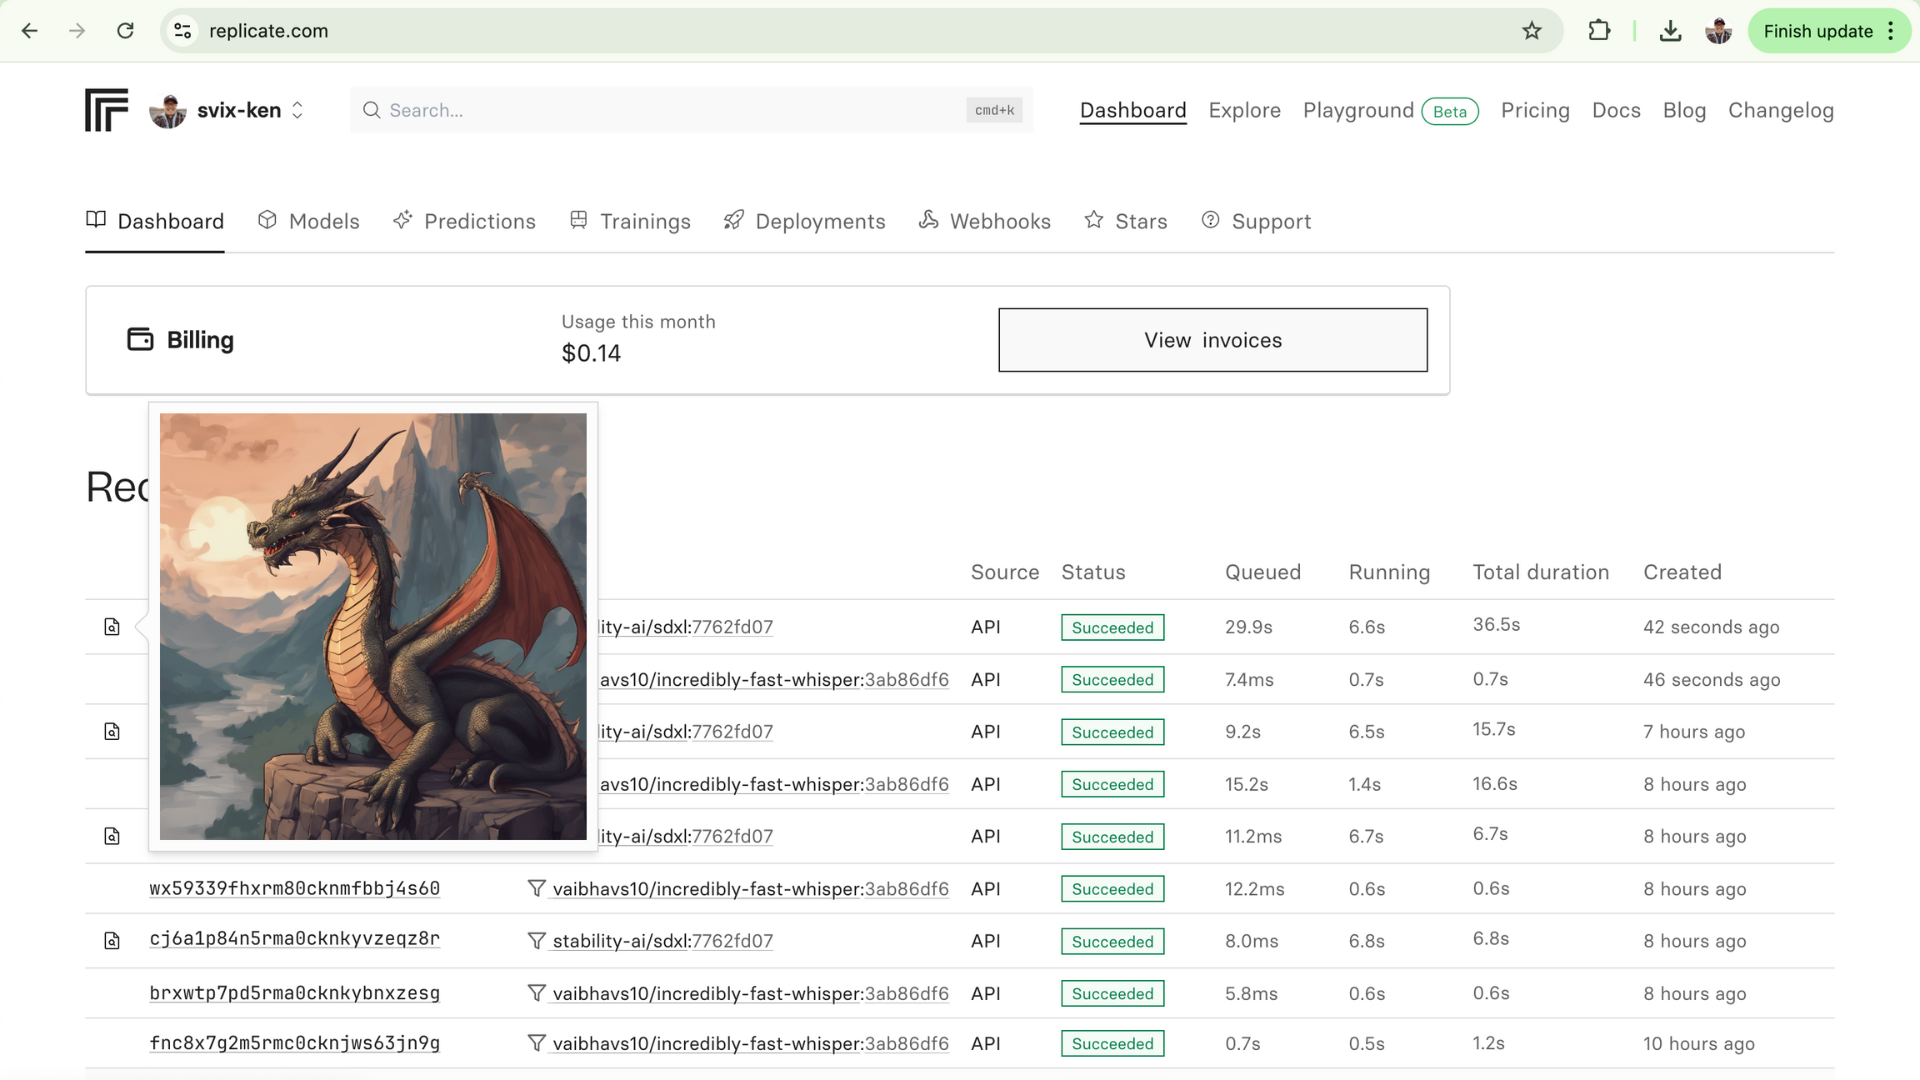
With this setup, you should be able to see the generated images in the Replicate dashboard:

We were able to have some fun and create some images like this one:
Prompt: "A dragon flying over New York City in the style of Ghibli Studios"

You can find the GitHub repository here: https://github.com/svix-ken/replicate-webhook.
For more content like this, make sure to follow us on Twitter, GitHub, or RSS for the latest updates for the Svix webhook service, or join the discussion on our community Slack.